Wednesday, 17 February 2016

The Birds - Part Three


Yep, it's those wacky Bird Crazy stamps again!

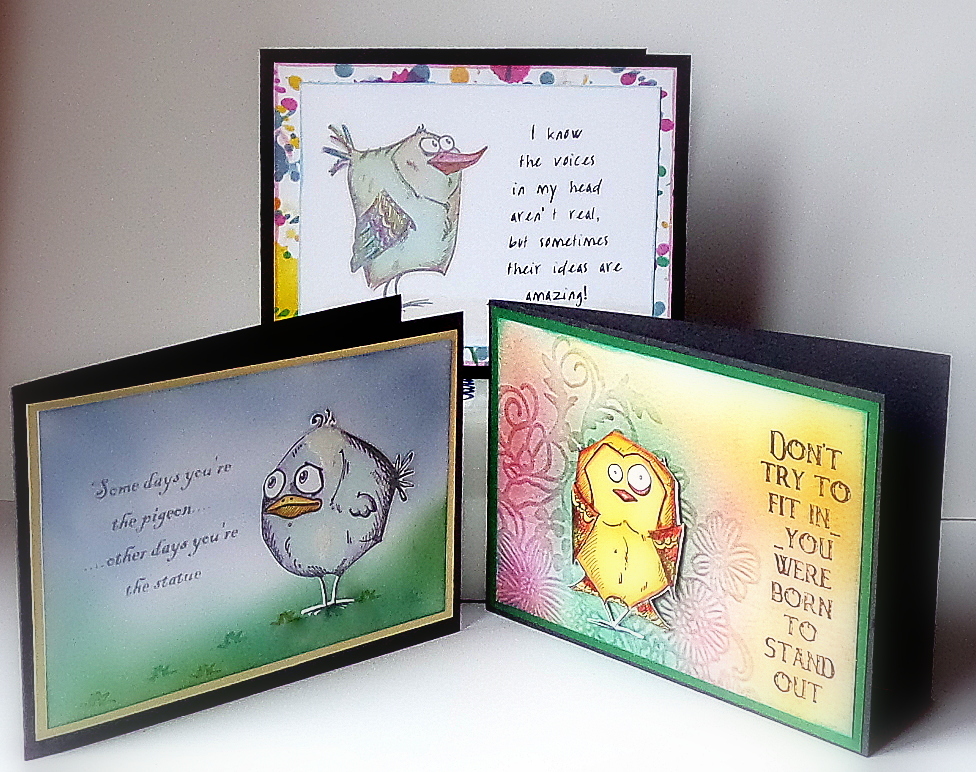
I recently came across a set of stamps by Lindsay Mason called "Quips" that I thought would be a great fit with Tim Holtz Birds, so here are a few of my attempts so far:


Voices


For this one I created a splattered background using the Tim Holtz Stencil to give a slightly, dotty, psychedelic look which I (or was it the voices) thought would perhaps go well with the Lindsay Mason Voices Quip stamp.


 What I Used
Cardstock
Black - PayPer Box
White - Image Supersmooth

Stamps & Stencils
Bird Crazy - Tim Holtz
Quips - Lindsay Mason
Splatters Stencil - Tim Holtz

Ink
Tim Holtz Distress Inks
Memento - Tsukinenko
Promarkers - Letraset


Stand Out


The background for this card came from a card my friend gave me for my Birthday. The front had a filigree cut out section so it just had to be kept as a template for experimenting with! This effect was created by running it through my Spellbinders Grand Calibur with the paper covered by the rubber tan mat. The embossed paper was then rubbed over with Distress Ink to lift the design. The Tim Holtz Bird was cut out and attached with a 3D glue so it would, as the quip says, stand out!  


What I Used
Stamps & Stencils
Bird Crazy - Tim Holtz
Quips - Lindsay Mason
Splatters Stencil - Tim Holtz

Cardstock
Navy Blue - PayPer Box
Green - Crelando
White - Papermill Direct

Inks
Distress Inks - Tim Holtz
Memento - Tsukinenko
Promarkers - Letraset


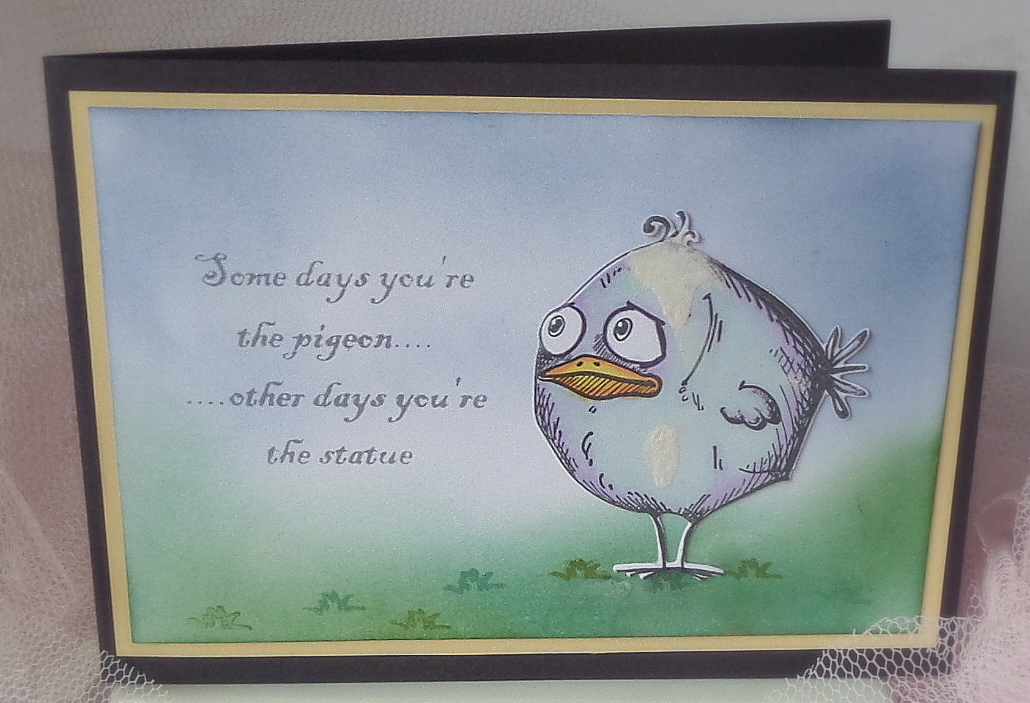
Pigeon v Statue

This quip was the one that sold me on the "Quips" stamp set and I just had to have it for my birds!

I kept the background simple and stuck with an open air feel by using Distress Inks to create a grass & sky background.


What I Used
CardStock
Black - PayPer Box
Pale Yellow - Crelando

Stamps
Bird Crazy - Tim Holtz
Quips - Lindsay Mason

Inks
Distress Inks
Memento - Tsukineko
Promarkers - Letraset


Monday, 15 February 2016

Cogs, Scribbles & Splats

Happy Valentine's Day!

Teenage son comes into my room to inform me that he will be heading out to meet some friends. "Who is she?" I enquired as son's face turns various shades of red, "Who says there's a girl, Mum?" so I told him his face told me all I needed to know - apart from her name but my guess as to that was, eventually, correct. I gave him the little box of heart shaped chocolates that came with the M&S "Dine in for Two" Valentine's selection his Dad & I plan to have tonight. Not to worry, there's a rather yummy pud (looks like a bar of gold bullion)  I picked up that may make up for  losing out on the chocolates.

The weather has been fickle again this time it can't make up it's mind if it wants to rain, snow or sleet but as long as it doesn't get too much colder I'll be fine. As it is this cold snap is playing havoc with my TMJ (painful jaw joint) as it sets the pain off. It doesn't help that the new Doc carrying out my last injection would appear not to have hit the right part of the muscle and I am experiencing the problems I normally get as the effects of it wear off around 12 weeks down the line only it's only been 3 weeks and my next one isn't due until the end of May. I can't have another injection so that leaves me muscle relaxants which are non selective and have been leaving me a little spaced out!


Time for this week's Freshly Made Sketches Challenge.


As it's Valentine's Day I used "love" for the sentiment but I didn't intend this as an actual Valentine's card.


Cogs


I decided to try a masculine card as I had recently bought a couple of "industrial" type embossing folders one with cogs the other with a tread plate design.  It was kind of crying out to be made using metallic cards so out came the copper, silver and gold cardstock and my Grand Calibur.


Craft Essentials Creative Embossing Folder was used to emboss the cog design on the copper & silver card while the individual cogs were cut from gold card using X-Cut Cogs Chronology dies. Crafter's Companion "Gun Metal" folder was used as a back ground. The card stock with the embossed cogs was lightly sanded and then lightly inked to give a distressed look.


What I used

Cardstock
PayPer box

Dies & Embossing
X-Cut - Cogs Chronology
Lawn Fawn - Scripty Love
Crafter's Companion - "Gun Metal"

Inks
Tim Holtz Distress Ink - Peeled Paint
Memento - Black


Scribbles & Splats

This is another card I've been playing with using some Tim Holtz Dies. I love the ornate grille design, in fact it was the reason I wanted the set. I decided to team it up with the Scribbles and Splats.


The card stock base is a 300gsm white linen and for each cut out in the white cardstock there is a shadow piece in metallic copper placed behind it. I used a leather effect paper in Navy blue as a contrast.


What I Used

Cardstock
Hobbycraft - DL White Linen Card Blank
PayPer Box - Navy & Copper Metallic

Dies
Tim Holtz - Scribbles & Splat
Tim Holtz - Mixed Media
Lawn Fawn - Scripty Love


Monday, 8 February 2016

Greetings!

Typical, just as I thought the windy weather had finally settled down I received yet another yellow weather alert for strong winds from the weather app on my phone! It has been quite a blustery start to the year so far.

One member of the household, our wee Jack Russell, who hates the rain decided that for some reason he now likes to go out in the howling, gale force gusting winds. I'm not sure if it was because of strange noises or new smells but he kept going up to the patio doors to get into the back garden, at one point I opened the door just as a massive gust decided to head north & straight in through the house. My neighbours had the opposite problem with their young Springer Spaniel who decided he didn't like the noises the wind was making and was apparently freaking out so his dad ended up spending the night on the sofa to try and keep him calm.


Work on the late 60's/early 70's chest of drawers I bought to up-cycle for my son's room continues. I'm only doing a little at a time but the drawers are almost finished, they just need varnishing and the two painted ones need their new handles fitted.


The new handles cost 10 times more than I paid for the unit from a local second-hand shop.  The owners are moving to new premises and reduced the price of just about everything to the princely sum of £1! I had very nearly bought it the week before but wanted to check sizes of it to make sure I had enough of the decoupage paper I wanted to use to cover the area I needed it for.  

I asked my son how he would like it done and had to laugh when I was told "As long as it's in keeping with the aesthetics of my room Mum I don't mind"!


For my attempt at this week's Freshly Made Sketches Challege #222 I decided to go for black & ivory and hopefully manage to make a card suitable for a male of the species.


For the card base I used a landscape hammered ivory card. I then took some black cardstock and ran the two short sides through my Darice Feathers on Side folder and applied it to the base. The card is a UK A5 size and the folder much smaller. In order to prevent the edges from marking lines down the cardstock I ran it through my Grand Calibur but instead if using the full size Raspberry Embossing Plate I used the embossing plate from my Sapphire which was the perfect width for the feathers.

I used the ivory hammered card stock with an assortment of dies to create the embellishments and added some faux stitches around the edges of the black card.


After I originally thought I was finished I just kept looking at it thinking something was missing & it was bugging me! In the end I had another look through my die collection. I found the Spellbinders Delightful Tree set which  had some small birds which I felt would add some additional interest and be in keeping with the feather embossing.


What I Used

Cardstock
Ivory Hammered - PayPer Box
Black - PayPer Box

Dies
Leafy Flourish - Die-Namics
Birthday from Happy Birthday Garland - Spellbinders
Birds from Delightful Tree Set - Spellbinders
Roses from Floral Heart Accent - Spellbinders
Greetings from Tim Holtz Holiday Word Script Set - Sizzix
Oval from Radiant Rectangles Set - Spellbinders Gold

Embossing Folder
Feathers on Side - Darice


Tuesday, 2 February 2016

Treasure Chests

In the months in the run up to Christmas I decided that for the younger nephews and nieces I would this year make them something more lasting than a toy to be cast away soon after Christmas.

In an earlier blog post I showed some wooden wine boxes I had worked on for Christmas presents for grown ups, the same do lots of other box styles and so I added a few to my possibilities for presents list. For the boys I decided that I would make some treasure chests for them to be filled with gold chocolate coins for Christmas and hopefully to fill with their own treasures in the coming years.  Even although I started my projects weeks well in advance of Christmas I was still working on them on Christmas Eve as I hadn't planned on a  painful flare up of my Fibro which put paid to progress while waiting for things to dry before starting the next stage helped pace me.  I now know what suffering for your art means!
 

The boxes were a nice quality although one did have a couple of screws missing on a hinge but that just took a phone call & an emailed photo to customer services at The Works and I was able to get a replacement box.

I used Distress Inks (spray & pad) to stain them. The ink gave good coverage and after they were done they were left for a couple of days to make sure that the ink was dry.


Once the ink was dry the inside was decoupaged with napkins which had a vintage map design and the inside edges gilded with Gedeo Liquid Gold. Once that was dry the outside was varnished before adding Grosgrain Petersham ribbon and some pyramid studs to look like leather strapping. Although not shown in the photo each chest had the recipients initial added before finishing off with a final coat of varnish. The initials were coloured with the matching ink and then coated with clear embossing powder and heated to give an enamelled look.

I left the boxes open for a few days to make sure the smell of Mod Podge and Liquid Gold had gone before filling some cello bags with chocolate coins & putting them in the chests.

I am happy to report that they were a massive hit with the boys, especially the pirate lovers!


What I Used
 
Medium Wooden Chest - The Works 
Distress Inks - Tim Holtz
Liquid Gold - Gedeo
World Map Cocktail Napkins - Caspari
Decoupage Glue - Mod Podge
Varnish - Deco Art


Monday, 1 February 2016

Paint it Black!

This is a post I was working on before my laptop decided it didn't want to play any more. I started it several weeks before Christmas however, with the way things are going at the moment, it may well be next Christmas before some of the projects mentioned get finished . . .

One of the new craft channels that have appeared in the last couple of months has had a few shows where they have been using decoupage and chalk-based paints to decorate a variety of MDF shapes. One of the demonstrators, John Lockwood from Creative Expressions, brought in a couple of pieces he'd picked up at a charity shop for a few pounds and had up-cycled. Previously I had been in a local shop which specialises in up-cycling and restoring furniture and whilst I loved what I saw I nearly choked on my Polo Mint when I saw what they were charging for a wee tin of paint!

I did a bit of research online and found recipes for a decoupage glue and glaze and also some for chalk-based paint (Apparently "Chalk Paint" is a Trade Name for the Annie Sloan product).  I opted for the fine calcium carbonate powder version. During a visit to a DIY store my friend spotted some of their own brand paint tester pots for the princely sum of 10p each & cleared the basket (there were only 20 or so but that's the equivalent of a litre of paint for £2 - they also have a deal on at the moment to have tester pots of mixed to order Valspar paint for £1 for 236ml so I think it will be a case of a few dark colours and buying a large tin of white to dilute them to the colour required! I have put the recipes I've used at the end of this post.
A few week's ago I espied a small side table in a second-hand shop that I thought would be a good practice piece for a spot of up-cycling.
Progress so far on the table has been slow, mainly because my back is playing up, though I have managed to get some paint on and decoupage the top and drawer front I have boobed a bit as I started to sand before I waxed and took off a wee bit more than intended. (The dark patches on the top is where it was still wet when I took the photo).

The paint goes on pretty quickly but as always watching paint dry seems to take forever but saying that it does mean I have no option but to pace myself.


These wooden boxes are intended to take wine bottles.

The colours I  used for the wine boxes were in fact mixed from some of the various 10p tester pots and are therefore unique to these boxes. Some Texture Paste was used with a stencil of a grapevine to add detail on three sides of each box and some gilding wax applied to add a touch of colour to the design. The boxes were given a light waxing with Rust-oleum Clear Finishing Wax.

They will be used as Christmas presents - I have been collecting wine when it's been on offer and I think (hope) these boxes will perhaps add a "Wow" factor.


Original condition
I've since also found a nice little nest of three tables for £15 and a scruffy on the outside but immaculate green baize inside East Craft card table from a second-hand shop for £10 which I snapped up. My son likes to play the card game "Magic The Gathering" with his friends and they often end up in his room either cross-legged on, or sprawled over, the floor so I thought a table to sit at would be better for them.


I had, by now, read about using white marble dust instead of the greyish calcium carbonate powder so I got some to add to some matt black paint to create this for my son's room. The plan was to keep the green baize inside as it was in excellent condition and no point in creating work when you don't need to.

On making up the paint it was obvious it wasn't going to be a pure black but rather a very dark graphite grey. Having said that it wasn't too far away from the colour of the Black and Silver Crackle Decopatch paper we decided to use for the top.


After a lick of DIY Chalk-based paint
Decided to give it a coat of varnish
instead of wax.
Finished off with some Cosmic Shimmer
Pewter Gilding Wax around the edges of the top.

After doing this one another similar table appeared on local Gum Tree site, same price but needing a bit more work (the baize was stained and ripped) - I wasn't sure to get it or not but when I mentioned it to my son he decided that it would be nice black on the outside with a red felt interior that would look great in his room. We bought it although it's in his room and still in need of up-cycling, it's sitting there because his chest of drawers is currently a work in (slow) progress and needs to be finished first!

I have tried a few of the DIY chalk-based paint recipes on the internet (Plaster of Paris, Calcium Carbonate and  Marble Dust) but my preference after having tried them is marble dust. The emulsion paint should be free of any primers as this can apparently cause problems with clumping I believe. When choosing a Matt Emulsion paint it should be free from primers.

  • Plaster of Paris - 1 Part Plaster of Paris to 3 Parts Matt Emulsion Paint. Add a little water to the powder to make a paste and slowly add the paint whilst stirring. This, for me at least, was the worst as it turned into a lumpy mass after a short while in use and ended up in the bin!

  • Very Fine powder Calcium Carbonate - 1 part to 2 parts Matt Emulsion paint.  It mixes easily with the paint although you may prefer to add one or two tablespoons of water to the powder to make a paste. Slowly add the paint to the paste and stir well. If you find the final mix too thin leave the lid off for a wee while to allow some water to evaporate or if you find it too thick slowly add a little water at a time until you get to your desired consistency. This was my original best choice. This powder is pale grey in colour so you have to bear this in mind when mixing with lighter colours.

  • Fine Marble Dust - 1 Part Marble Dust to 2 Parts Matt Emulsion paint.  It mixes easily with the paint although you may prefer to add one or two tablespoons of water to the powder to make a paste. Slowly add the paint to the paste and stir well. If you find the final mix too thin leave the lid off for a wee while to allow some water to evaporate or if you find it too thick slowly add a little water at a time until you get to your desired consistency. This is now my favourite and I've been really pleased with the results I've had with it.


What I Used
Wine Boxes
Wooden Wine Box - The Works
Paint - Assorted Sample Pots Homebase Matt Emulsion
Calcium Carbonate - Oliver Brown via Amazon.co.uk
Vine Stencil - Rustoleum Rose & Vine Set
Gilding Wax - Cosmic Shimmer
Texture Paste - DecoArt Media Sand
Wax - Rust-Oleum Furniture Finishing Wax
Small Table
Decoupage Paper - Craft Consortium White Crackle
Glue, Seal and Glaze - Cosmic Shimmer
Paint - Homebase White Matt Emulsion
Calcium Carbonate - Oliver Brown via Amazon.co.uk
Wax - Rust-Oleum Furniture Finishing Wax
Card Table
Decoupage Paper - Decopatch 469 Black and Silver Crackle
Glue, Seal and Glaze - Cosmic Shimmer
Gilding Wax - Cosmic Shimmer
Paint - Valspar Black (B&Q) Matt Emulsion
Marble Dust - Robersons
Satin Varnish - DecoArt


A Belated Happy New Year

Ok, I know, it's February but I have been bereft of a laptop of late & Smart Phones aren't really designed for people with arthritic fingers to type blogs. My laptop problem is now sorted and I'm now able to get on with things again.
The weather here today is wild -  the wind is Blawin' a hooley while the rain is fair stoatin aff the grun!* Our wee Jack Russell is not happy with wet weather and it's as soon as he's out the door he's straight back in again - he's no daft!

The weather's been pretty wet and windy all year so far I just hope this is not a portent of the year to come!
*Translation: It's rather windy & it's raining so hard that it's bouncing off the ground.
This week's Freshly Made Sketches Challenge is a fairly simple one which just
seemed to be ideal for one of my latest acquisitions - the All Occasions "That
Folder" embossing folder.

It originally a papercraft magazine freebie that I intended to get but by the time I went for a copy the magazine had sold out. A couple of weeks or so ago I was on the Craft Stash website (a company which supplies some of the freebie items to papercraft magazines) and they had released it on a special limited run and there was only 1 left . . .  hooray!
The folder is actually 6"x6" but for this card I trimmed it to fit an A6 (A2) blank.
  
The flower comes from a Craft Creations Creative Die "Floral" which was another magazine freebie, I hadn't used it before so thought would give it a try with this. It's a three die set and the largest of the flowers is a 3D die. I layered the components together and cut an extra leaf to create the embellishment. The sentiment comes from a Sizzix Thinlit stamp and die set and it was finished off with some fine glitter dotted across the central band of the embossed design. The glitter is another one of my bargain finds, it comes from a set consisting of NPW fine tip glue pen and five pots of glitter. I bought the set for the princely sum of 59p from Home Bargains, the identical set from Selfridges online costs £5.95!

CardStock
All Cardstock from Paper Mill
Embossing Folders Dies and Stamps
All Occasions "That Folder"
Craft Essentials Creative Dies - Floral
Sizzix Thinlits with Stamps - Fancy Labels #2
Inks
Versafine - Majestic Blue
Promarker - Indigo Blue
Etc
NPW Glue & Glitter Set
Bling from own stash 


Monday, 2 November 2015

Clocking In

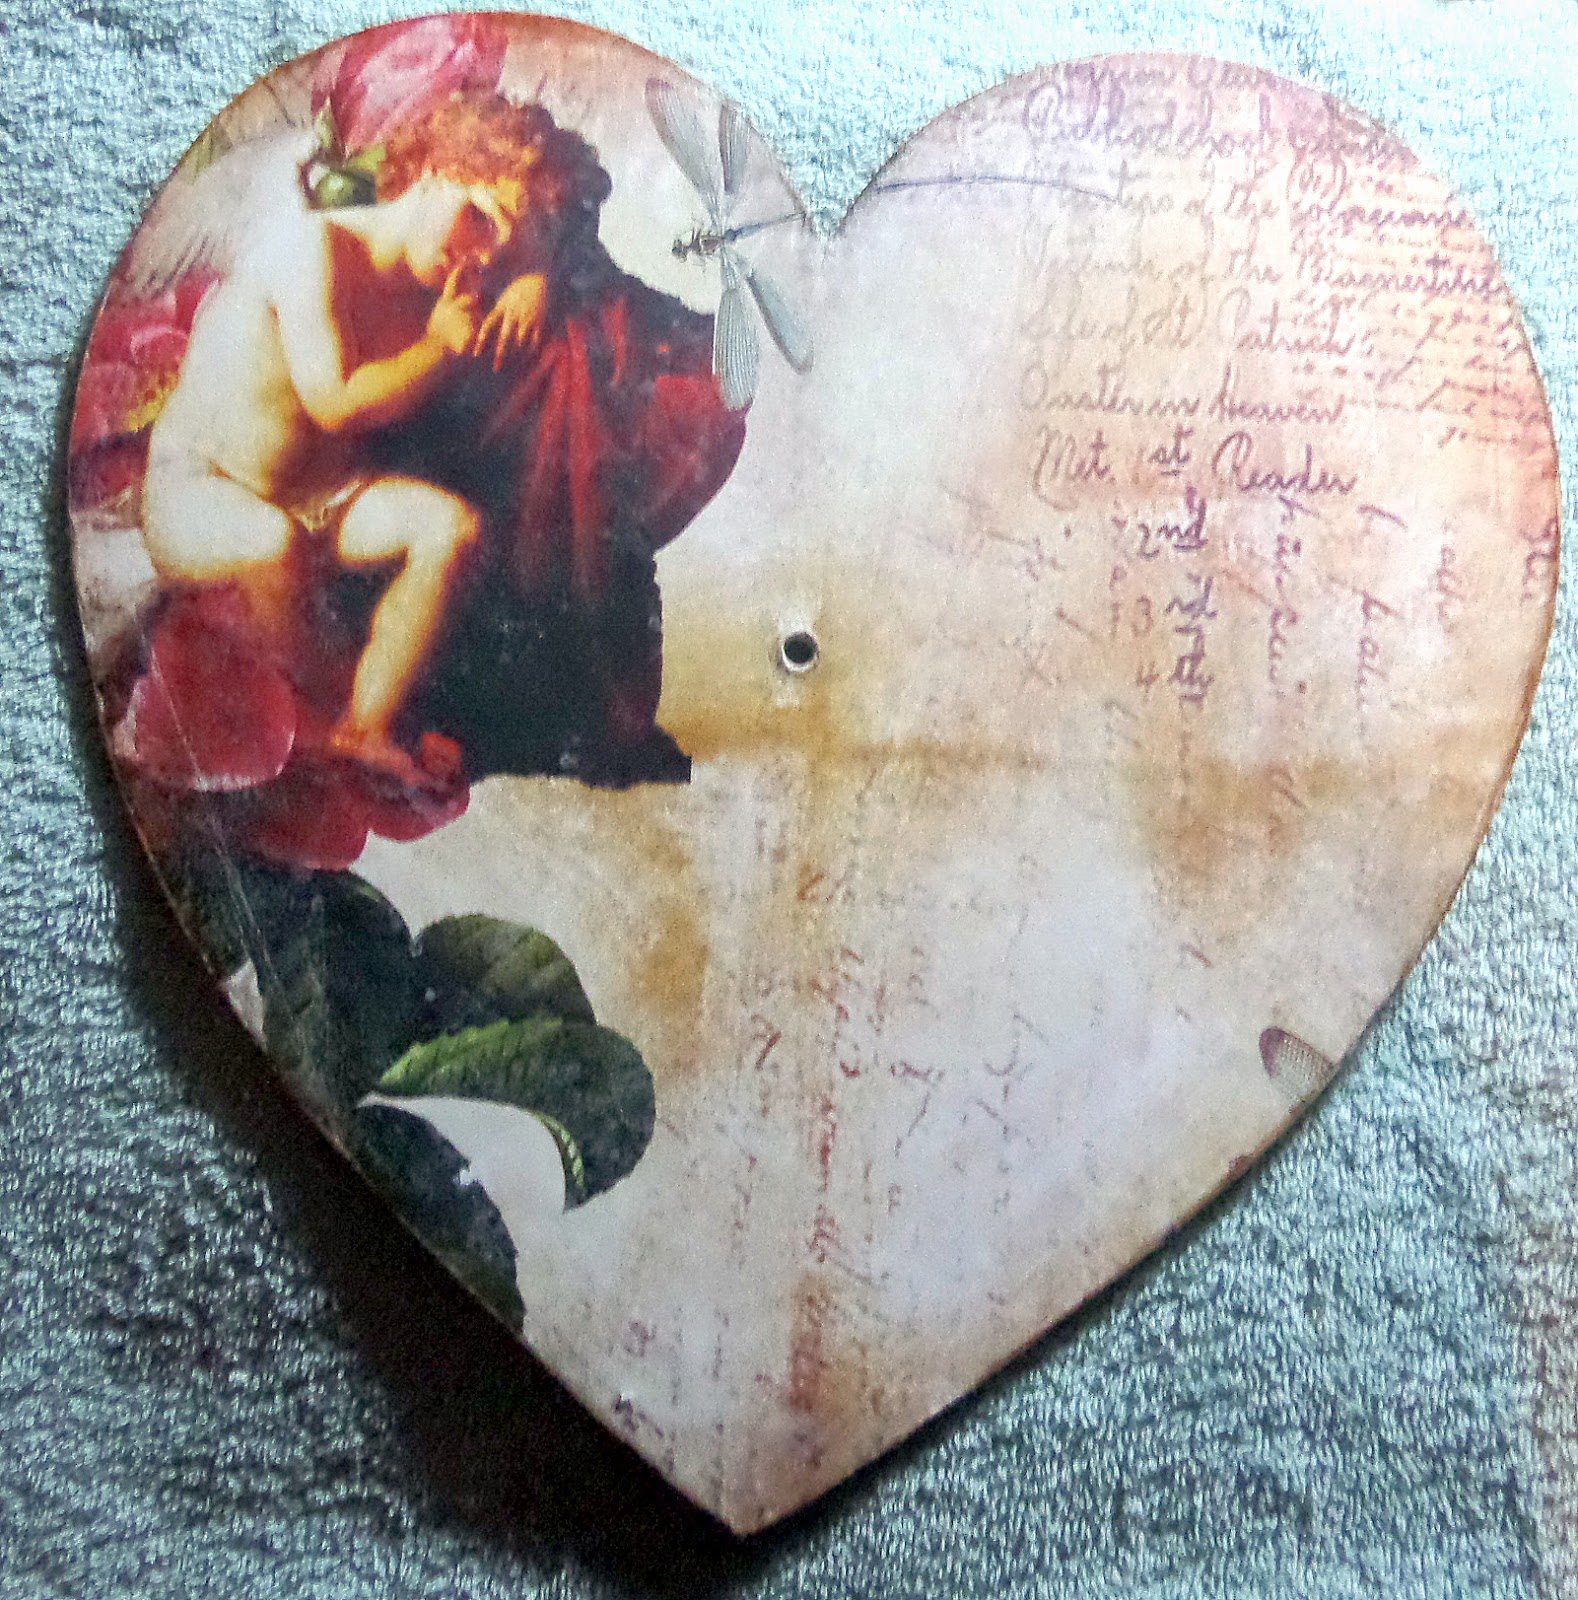
I've finally finished the mixed media clock I was working on and had it photographed. I bought it in a sale after watching an Indigo Blu mixed media demonstration on one of the new UK craft channels Hochanda.com using one of their clock kits. My purchase was £3, the Indigo Blu kit costs £7.99!  
 
 
It's taken me weeks because I've really only been doing a few minutes here and there. I've been a bit unsure about what I've been doing and my arthritis has been playing up but I have to now admit that I am hooked on this mixed media clock décor thing and it looks as though I may have some Christmas present ideas milling around.
 
I used a number of Indigo Blu products, including the paper (from the "Vintage Memories" paper stack), clock numeral stencil & "Good Times" A5 stamp.
 
I managed to find a supplier of MDF and Ply shapes with reasonable prices so sent off for a heart and a teapot . This next clock is intended for my sister and her husband - so far I've got the blank gessoed, the paper, from Indigo Blu's "Emporium of Curiosities", stuck on and am currently at the sitting, staring "what now?" stage. 

As for the teapot . . . well, it seemed like a good idea at the time!


I missed the deadline for last week's Freshly Made Sketches but I think I might just manage to clock in, in time, this week! 
 
For this week's Freshly Made Sketches Challenge I decided to flip the design onto it's side and hang up some stockings.
 
 
Once again I have used some of the lovely freebie Winter Wonderland stamps, Norwegian patterned stockings, from Simply Cards and Papercraft magazine (craftstash.co.uk also stock various stamps from the freebie sets as Apple Blossom Craft Collection).
 
 
The stamps were each inked using 3 different Versafine pads:Smokey Grey, Crimson and Olympia Green then fussy cut and shaped before mounting onto the background. The background was inked with Distress Inks Evergreen Bough and Peeled Paint, the holly was stamped with each of the three inks.


Cardstock:
PayPer Box - Kraft
PayPer Box - Ivory Hammered

Stamps:
Apple Blossom Winter Wonderland Stamps - Norwegian Patterned Stockings


Monday, 19 October 2015

Krafty Poinsettia

For anyone who didn't see the Scotland v Australia Quarter Final at the Rugby World Cup - we wuz robbed! A penalty kick awarded to the Wallabies in the final minute of the match, for something they did (if Ref went to the TMO he would have seen it!) and the Aussies won by a single point. I think the whole of Scotland was gutted for those lads who gave it their all!  The way the Ref sprinted off the pitch as he was blowing the final whistle was probably the biggest clue that he knew he'd made a huge mistake - the rude so and so never even shook hands with the Team Captains!

Ah well, there's always the Six Nations to look forward to in the New year!

Still not got a lot done regarding Christmas cards but I have been experimenting using Kraft paper with clear embossing powder and came up with a poinsettia that looks like it's made from spun caramelised sugar! I decided to use it for this week's entry into the Freshly Made Sketches Challenge #208
 
 
The Christmas bauble in the background of the photos is a work in progress. I used the Darice Ivy Corner embossing folder to create a strip detail instead of a ribbon.
 
These filigree dies are lovely but all the chads that come off are a pest. I have found that putting in a poly bag (zip-lock best) and giving a sharp tap on the edge of the table frees them from the die without going everywhere. If they are still stuck within the die cut, again put it in a bag and try using one of the rotating brushes on the market seem to free them without them making a mess!


Cardstock
 PayPer Box - Kraft
PayPer Box - White Linen
 
Embossing Folder
Darice - Ivy Corner
 
 Dies 
Sue Wilson Creative Expressions - Filligree Poinsettia


Stamps
Magazine Freebie
 
Inks
 Versafine - Antique Sepia
Distress Ink - Evergreen Bough