Sunday 28 June 2015

Embossed Ribbon

Someone asking a question on Facebook earlier about inking onto ribbon left me thinking about how to do that without the ink sinking into the weave. The only thing I could think of was to use a PVA solution (like Modge Podge) to seal and stiffen it first.

I've not tried it but it reminded me of this technique I use to emboss ribbon:
Make up a 50/50 solution of PVA/Water or Mod Podge or other liquid glue that dries clear (I used my Amos clear for this one) put the ribbon in the glue solution till wet through, remove excess and allow to dry and stiffen up (thinking about it now, it  may also be possible that a starch solution/spray starch would also work).


 thought I had a photo of a previous effort but couldn't find "one I did earlier" so I decided to make some up using some single sided satin ribbon. 

Once the ribbon was ready I used a Darice border embossing folder (piece of thin card in first with the ribbon  on top of it to give the folder something to "bite" into) and ran it through my Spellbinders Sapphire. I only used the Sapphire because it was sitting out and I couldn't be bothered hauling out my GC for a small piece of ribbon. As Spellbinders don't have a Sapphire equivalent of the "Raspberry" Embossing Plate, the "sandwich" I used for the Sapphire was Cutting Plate C, Embossing (Tan) Mat, Darice folder & topped off with a thin card shim for good measure).

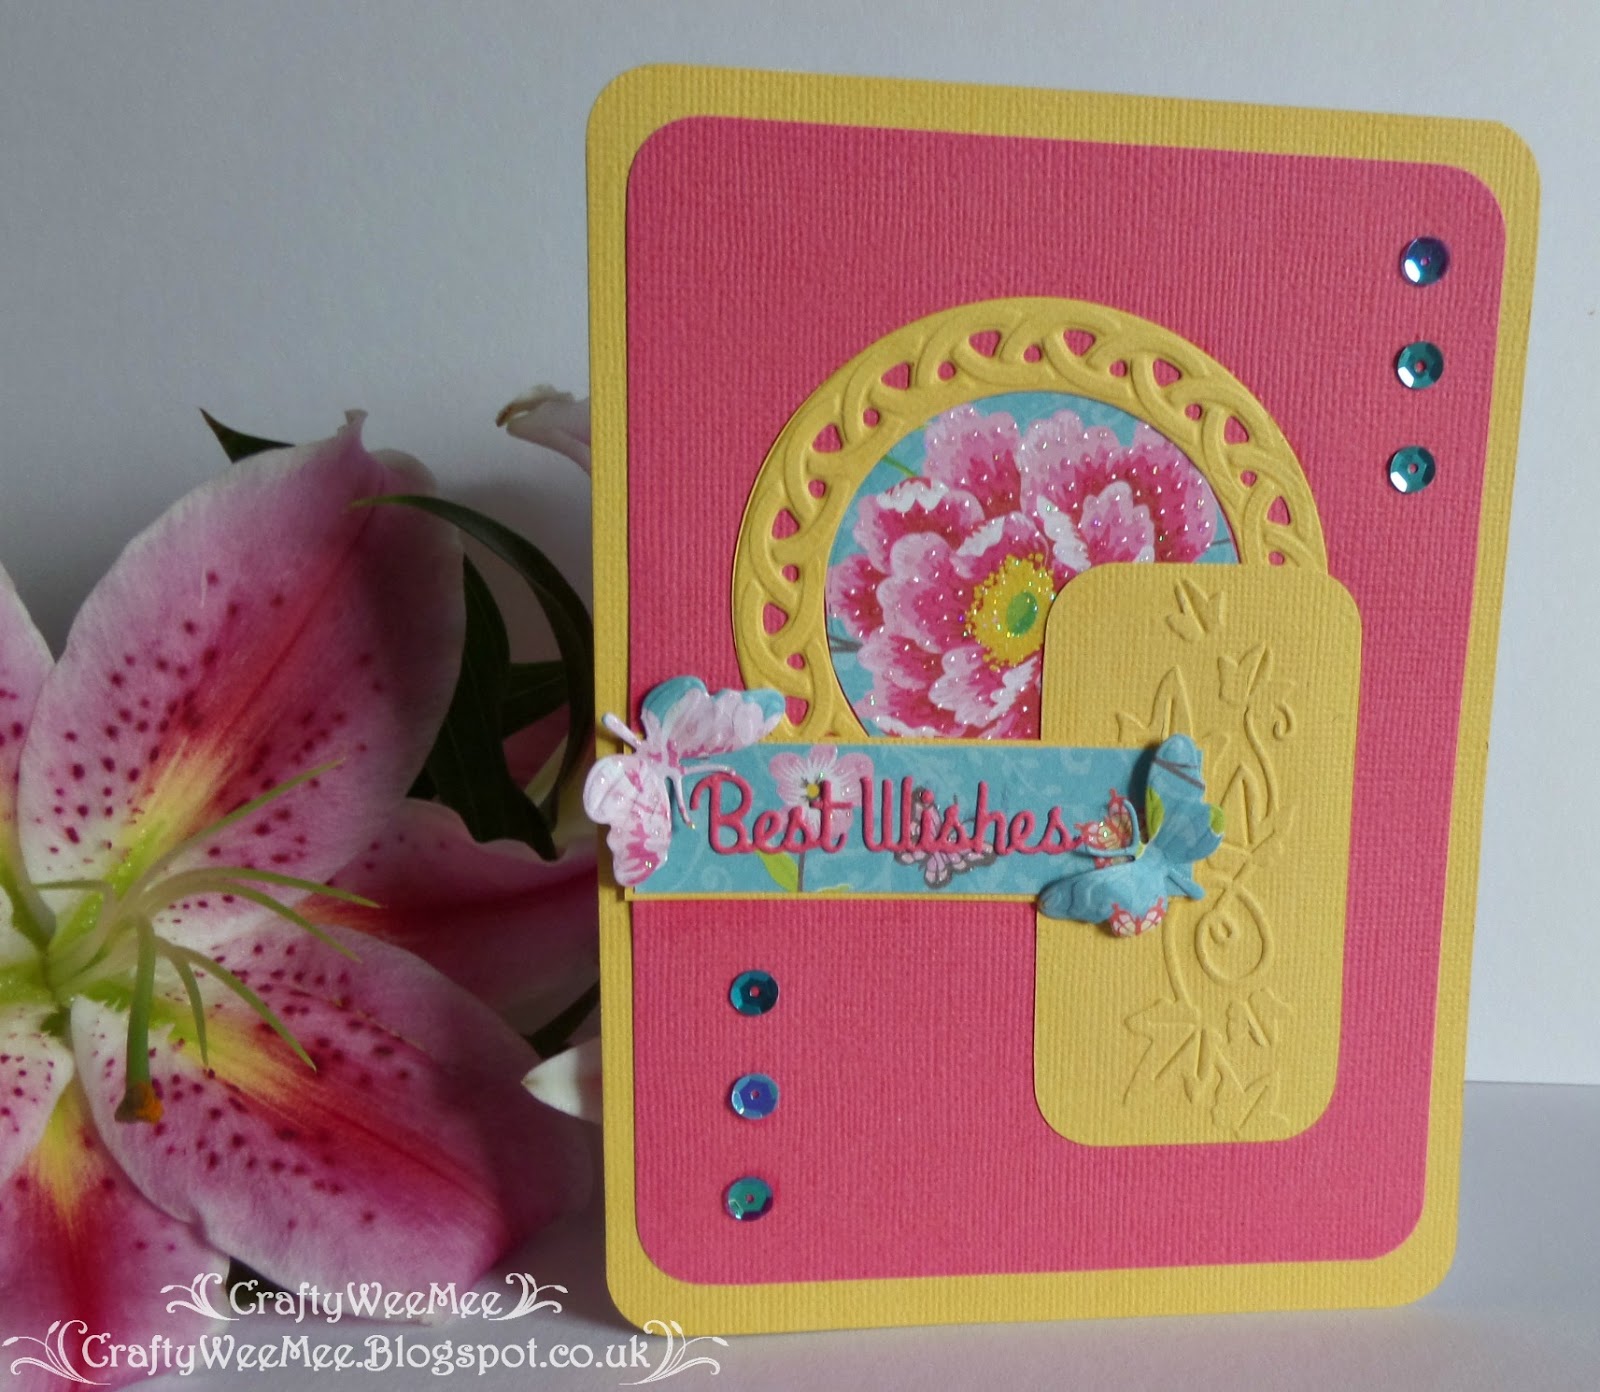
Once I had the piece of embossed ribbon I decided I'd better make something to show it off so here it is on a finished card:


I used PayPer Box Kraft card which I top folded as an A6 base. The embossed ribbon was wrapped across a piece of trimmed ivory coloured textured cardstock which was used as a layer on top of the Kraft card.

I coloured some pearlised cardstock with a "Sandstone" Promarker to match the ribbon, and used it to make some floral die cuts to create an embellishment.  I also colour matched the Card Candy.


Cardstock:
PayPer Box - Kraft
PayPer Box - Ivory Textured
PayPer Box - White Pearlised
Dies:
Spellbinders - Flowers & Flourishes
Spellbinders - Poppy

Accessories:
Ribbon - Club Green Gold Single Sided Satin
Card Candy - White
Embossing Folder - Darice Border Flourishes
Letraset Promarkers


Time Flies - FMS 192


During the week when I was looking out some floristry bits a pieces I kept having "I wondered where that went" moments as I found things that I had thought long lost. The same thing happened today as I delved into a couple of boxes of crafty stuff and came across some nice pearlised linen effect cardstock I knew I had but just couldn't remember where I'd put it. Now it has been re-discovered I have put it in my A4 drawer unit with my other pearlised stock for future use.

 
I had originally been going to use a star as my starting point but as the instructions are "any shape" I decided to use a rather nice Debbie Moore dragonfly stamp that had been a freebie with a craft magazine a couple of weeks or so ago.As I'd rediscovered it, I decided to use some of the nice pearlised linen effect cardstock for this card. However, as I don't have a lot of it I decided to be a frugal crafter and just use a piece as a panel on a supersmooth base.

The card was top folded and some gold washi tape with small white polka dots was run down the sides of the card to create the borders.

I stamped the dragonflies and the "Time Flies" sentiment using Versasmark clear embossing ink so I could add some gold embossing powder. I also inked and embossed a small strip of card to create a background for the sentiment. I coloured the dragonfly and small flowers in the main circular design element with Promarkers to add a little colour


Cardstock:

Image Supersmooth - White
Payperbox - White Pearlised Linen Effect

Papermania Capsule Collection Spots & Stripes Jewels Patterned Craft Tape - Gold & White Spotted Washi Tape

Stamps:

Debbie Moore - Flutterbys - Dragonflies Summer Fun Clear Stamps

Inks etc:

Tsukineko Versamark Clear
Letraset Promarkers
Create & Craft Embossing Powder - Mirror Gold


An Emotional Week

Last Friday the oldest of my late Dad's sisters, my Aunt Nan, passed away a few weeks before her 87th Birthday so it's been quite an emotional week. Whilst I didn't take part in last weeks FMS challenge I did use the sketch to make Sympathy Cards for my cousins and her surviving sister.
 
This was one of the versions the others had the same sentiment but just had a different die cut.
 
As well as the Birthday cards I mentioned in my last post and Father's Day cards to be finished on Saturday I needed to started sort out what I required to create a floral tribute from myself & my boys - then when I mentioned what my plans were my sister asked if I'd also do one on her behalf as well. Fortunately I was able to source the foam frames I needed locally and still had some florists ribbon in my floristry stash box to make the edging pleats - just needed to remember how to do it as it's been years since I last did any.  After a YouTube refresher course I eventually managed to get the hang of it again! 
 
I went out to see what flowers were available and started planning what to use, with strict instructions from my sister that she didn't want any red flowers. I must admit I'm not keen on using red in tributes either. I bought the flowers on Monday, I went for white and green chrysanthemums with some Sea Thistle. I wanted to make sure I could get as many opened as possible for putting them together on Tuesday. I also had a look at what foliage I had in the garden would work best with the flowers I had - I decided on the Euonymus Fortunei "Emerald Gaitey" and some of the small clusters of berries from our Vibirnum Davidii.
 
I have to admit I got quite emotional whilst I was making these up and kept having to stop but got there in the end. I'm happy to say my sister was pleased with my efforts on her behalf.


Thursday 25 June 2015

Spellbinders Sapphire Butterfly Die Update II

A package from Spellbinders finally arrived at my doorstep.

I saw it was a biggish box, "Oooh" I thought, "this could be interesting"! That thought last but a nanosecond when the postie handed it to me and it was as light as a feather!


No wonder it was so light, when I opened the box all it contained was a lot of screwed up kraft paper and a sheet of bubble wrap (have they never heard of "Jiffy" bags?) bundled around a tiny cello bag containing the new die! Yep that was it, no letter of apology, not even a compliments slip and certainly no sign of any goodwill gesture for alerting them to problem in the first place!!! I think they probably spent more on the packaging than they did to make the die, the customs slip gave the die's value as $1 or around 65p!
 

Here are the two butterfly die together to show how it's been modified with a rounder interior to the wings:


As for Create and Craft, the company who sold the Spellbinders Sapphire with the die set, I've heard nothing since I was contacted on 27 May 2015. The person from the Customer Service Escalation Team told me they would keep me informed of the progress of my complaint - mind you, there are a lot of unhappy people posting to their Facebook page at the moment so maybe they're busy sorting them out first!!!

Neither company seem anxious to make the problem known and it would appear that if you have one of the sharp dies it will only be replaced if you contact Karen Haas Spellbinders' Care & Customer Support Manager with a photo of the offending item.  (Karen was also the contact who arranged a replacement handle for my original GC when it snapped off.)  

Sunday 21 June 2015

Busy with Birthdays!

It's been a busy time Birthday-wise (not forgetting it's also Father's Day) this weekend. The next day or so will also be busy as I have a number of Sympathy cards to finish after a family bereavement as well as floral tributes to create.

As well as it being my friend Gena's Birthday it is also the 40th Birthday for  Niece, Donna, so that's three Birthday cards and two Father's Day Cards. I'm only posting the Birthday cards on my Blog today.


:: :: Good Friends:: ::


For Gena I've made two cards, one for my son, Liam, (Gena's Godson) to give her and one from Hubby & Me.

I've had these Tim Holtz stamps for a few weeks now and have been practicing my "colouring in" in preparation for finally getting around to using them properly.

I had a few false starts stamping the images as I hadn't quite got some of the positioning right. I impressed myself with my first attempt masking off and stamping a second image to look as though one was behind - only to put the word "alone" in the wrong place!  With a bit of jiggery-pockery in the guise of a die cut label
stamped with a sentiment I think I may have got away with it!


As I was using the same Bird Crazy stamp on the inside as well as the outside
I coloured them both at the same time to ensure that they matched as well as I could get them to.


Outside of Card


Inside of Card

Cardstock:
Image - Supersmooth White
American Craft - "Summer" Collection Blues

Stamps:
Stampers Anonymous - Tim Holtz "Bird Crazy" & "Way With Words"
Lawn Fawn - Balloon from "Hippo Birdie" Year Four die set
Lindsay Mason Designs - "Everyday Words Happy Birthday"

Ink:
Memento - Tuxedo Black
Ranger's Tim Holtz Distress Ink - Faded Jeans
Letraset ProMarkers - Assorted Colours


 :: :: "Hippo Birdie To Ewe" :: ::


The one I made for Liam to give was a fun one based on the Karen Burniston's Katie Label Pivot Die from Elizabeth Craft and Lawn Fawn's "Hippo Birdie" stamp/die set. I thought if you have a Hippo and a Birdie you really need to have two Ewes as well so I also used Rachelle Anne Millar's "Love Ewe" stamp set from Crafter's Companion. To complete the card I used Couture Creations "Pure Pleasure" small embossing folder - oh and some Marianne Design Butterflies & Flowers coloured with Promarkers then heat embossed with glitter embossing powder!

Front
Card When Opened


I used a fine liner pen to try and create a similar grassy area under the Hippo & Birdie dies as on the "Love Ewe" Stamp

Close Up of Ewes


Cardstock:

 PayPer Box - Turquoise
Image - Supersmooth White

Dies: 
Elizabeth Craft - Karen Burniston's Katie Label Pivot Die Lawn Fawn - "Hippo Birdie" Year Four die set
Joy! Crafts - Cut & Emboss Butterflies Set, Cut & Emboss Flower Set

Stamps:
Lawn Fawn - "Hippo Birdie" Year Four stamp set
Crafter's Companion - "Love Ewe" stamp set by Rachelle Anne Millar

Ink:
Memento - Tuxedo Black
Letraset - Promarkers Assorted Colours

Embossing Folder:
Couture Creations - "Pure Pleasure"


 :: :: Donna's 40th :: ::

For Donna's Birthday I spent rather a long time working on this card only doing a little at a time and each time not being entirely happy as it wasn't quite coming out as I imagined it would!

Apart from the Karen Burniston's "Lots of Pops" Pop Up die from Elizabeth Craft the embossing folder and dies are from Spellbinders. I used a pearlised card stock but some sheets appeared to be a slightly different colour to others which I didn't really spot when working late at night under artificial light. I also put my new heat gun to use heat embossing butterflies with a glitter powder - in the photo below they appear to be quite dark but there certainly wasn't such an obvious difference in "real life".  


Inside is the Karen Burniston "Lots of Pops" Pop Up mechanism which was teamed up with the labels from the "Lucy Labels" Pop Up set, acetate strips (recycled from some packaging) and various Spellbinders' butterflies which were heat embossed with embossing powder. When Donna got married she used the same colours with a butterfly theme so made this card with that in mind. The interior card was embossed with Couture Creations "Ambrosia" Folder.


Cardstock:
PayPer Box Pearlised
Dies:
Spellbinders "Outrgeous Butterfly", Small Butterflies from "Postively Me" Jewel Flowers and Flourishes Set, D-Lites "Corners & Accents Two" 

Elizabeth Craft's Karen Burniston "Lots of Pops", "Lucy Labels"

Embossing Folders:
Spellbinders "Labels Thirty Four Medallion"
Couture Creations "Ambrosia"


Friday 12 June 2015

New Toys!

The wind and rain have, at last, subsided and the sun has finally reached the Kingdom of Fife - yipee!!! I always feel better when the sun is shining - my joints certainly appreciate the warmer weather!

When I was have my clearout the other week I came across several jars of embossing powder that I've had for a few years but hardly used as my heat gun stopped working and I never got around to replacing it.  I had some Birthday money left over so decided maybe it was time to get a new one so I bought a Ranger Heat It tool along with some UTEE to try.  The UTEE is Cosmic Shimmer but for some reason this particular colour was rather cheap and classed as an "add on item" on Amazon - I wasn't too bothered about the colour, Lapis Black, I just wanted  get some to try it out.)
My order has now arrived so it was time to play. I found that perhaps why the UTEE was cheap was maybe due to the fact that the Lapis Black ain't black, it's more of a peacock blue/green. Never mind, as long as it works!

I dug out some of the die cuts I'd been making from scrap cardstock on my new Spellbinders Sapphire and set to work on them. I took a Joy! Craft butterfly applied clear embossing ink then sprinkled on the UTEE, once it was melted I sprinkled it with some gold and silver ordinary embossing powder and reheated it before decided to add a little black to it as well. Turned out rather well I thought - think it would make a nice brooch if it had been put on chipboard.

For this week's Freshly Made Sketches Challenge card, (based on sketch below) 


I decided to use a filligree style butterfly within the oval. Once cut & clear inked I  used black embossing powder, heated it to melting point then added some of the UTEE to give it a little splash of colour.

Once I had my butterfly sorted out I set about looking for what else I could use. I took my Darice Oval embossing folder and embossed some pearlised cardstock which was then trimmed around the scalloped edge to create a topper.


I played about with my Promarkers to create a coloured a strip to go down the left hand edge, the nearest colour in my collection which toned with the Lapis Black was "Soft Green".  Originally I thought of making diagonal black and Soft Green stripes but then settled on plain green before deciding that was too plain! To compromise I cut a narrow, tapered, strip from one of the striped pieces I'd made and stick it on a diagonal over the Soft Green one. I finished off by adding a daisy with a coloured (& glittered) centre and a colour co-ordinated "Love" sentiment. I toyed around with making my own version of baker's twine (using kitchen string and Promarkers) but wasn't sure if I liked it so took photos of the card with & without - still not sure which version I prefer!


Cardstock:
PayPer Box - Pearlised White
Image - Supersmooth White

Dies:
Spellbinders - Outrageous Butterfly
Spellbinders - Jewel Flowers & Flourishes.
Lawn Fawn - Scripty Love
 
 Inks etc:
Dovecraft - Clear Embossing Pad
Cosmic Shimmer - UTEE Lapis Black
C&C Embossing Powder - Black
Superfine Clear Glitter

Letraset Promarkers - Black & Soft Green

Saturday 6 June 2015

Summer's Here (sort of)!

It's June, it's supposed to be Summer so why am I feeling so cold & need the heating on! So far all we've had is rain and at the moment the wind is, as they say in these parts, "blawin' a hoolie" with gale force winds forecast!

For this week's Freshly Made Sketches challenge (No 189) I decided to go with some bold coloured cardstock for a change.


When shopping in Lidl yesterday there was a pack of craft papers with some lovely bright, bold, designs in it which just sort of leapt off shelf, threw itself into my trolley and begged me to take it home with me (well that's my excuse anyway!). Fortunately I also just happened to have a box of American Craft "Summer" 12x12" cardstock which has some similar colours to those in the new paper pack - had it for ages but this was it's first outing. I have to admit I don't normally use mainly coloured cardstock as a background so this is new territory for me! The AC cardstock was matted and layered onto white pearlised card.


Once I had put this photo up on the blog I realised that I had made some mistakes in putting it together - one being there are too many different floral patterns in it.  I also felt that the circular section was too big - nothing for it but to have another go!

I really must get some more circular dies as the only ones I have are from the Joy Craft Floral and Celtic Circles set or really dinky ones that came with the Spellbinders Sapphire - must add some to my wish list!  


I just kept to the same basic colours - a case of waste not, want not - as I'd already cut into the cardstock and there was plenty left over. I reduced the size of the circular section etc and changed the embossing folder used. I used the floral paper to create a couple of butterflies and had a rake though my box of bits where I found some aqua coloured sequins to finish it off.

I had some gorgeous Oriental Lillies left over from my Birthday so thought I'd use them as a pretty background when I was taking the photos of the cards - they smell rather wonderful too!


Cardstock:
American Crafts - "Summer" Seasonal 12x12"
Crelando - "Romantic" Patterned Paper
PayPer - Box White Pearlised 

 
Dies & Embossing Folders:
Joy Craft - Floral and Celtic Circle Die Set
Joy Craft - 3 Butterflies Embellishments
Spellbinders - D-Lites Sentiments 1

Darice - Poppy Field
Darice - Ivy Corner

Embellishments:
Sequins (from my stash)