Showing posts with label Letraset Promarkers. Show all posts

Thursday, 10 March 2016

Nine Lives

One of my oldest friends, we've known each other since we were but teenagers, now spends a lot of her time looking after rescue cats and is always looking for ways of raising funds to care for both those she rescues and for others who also carry out the same work at home and abroad. As part of her fund raising efforts I've offered to make cards she could sell and so I have been looking for more cat-themed stamps etc that would be suitable.

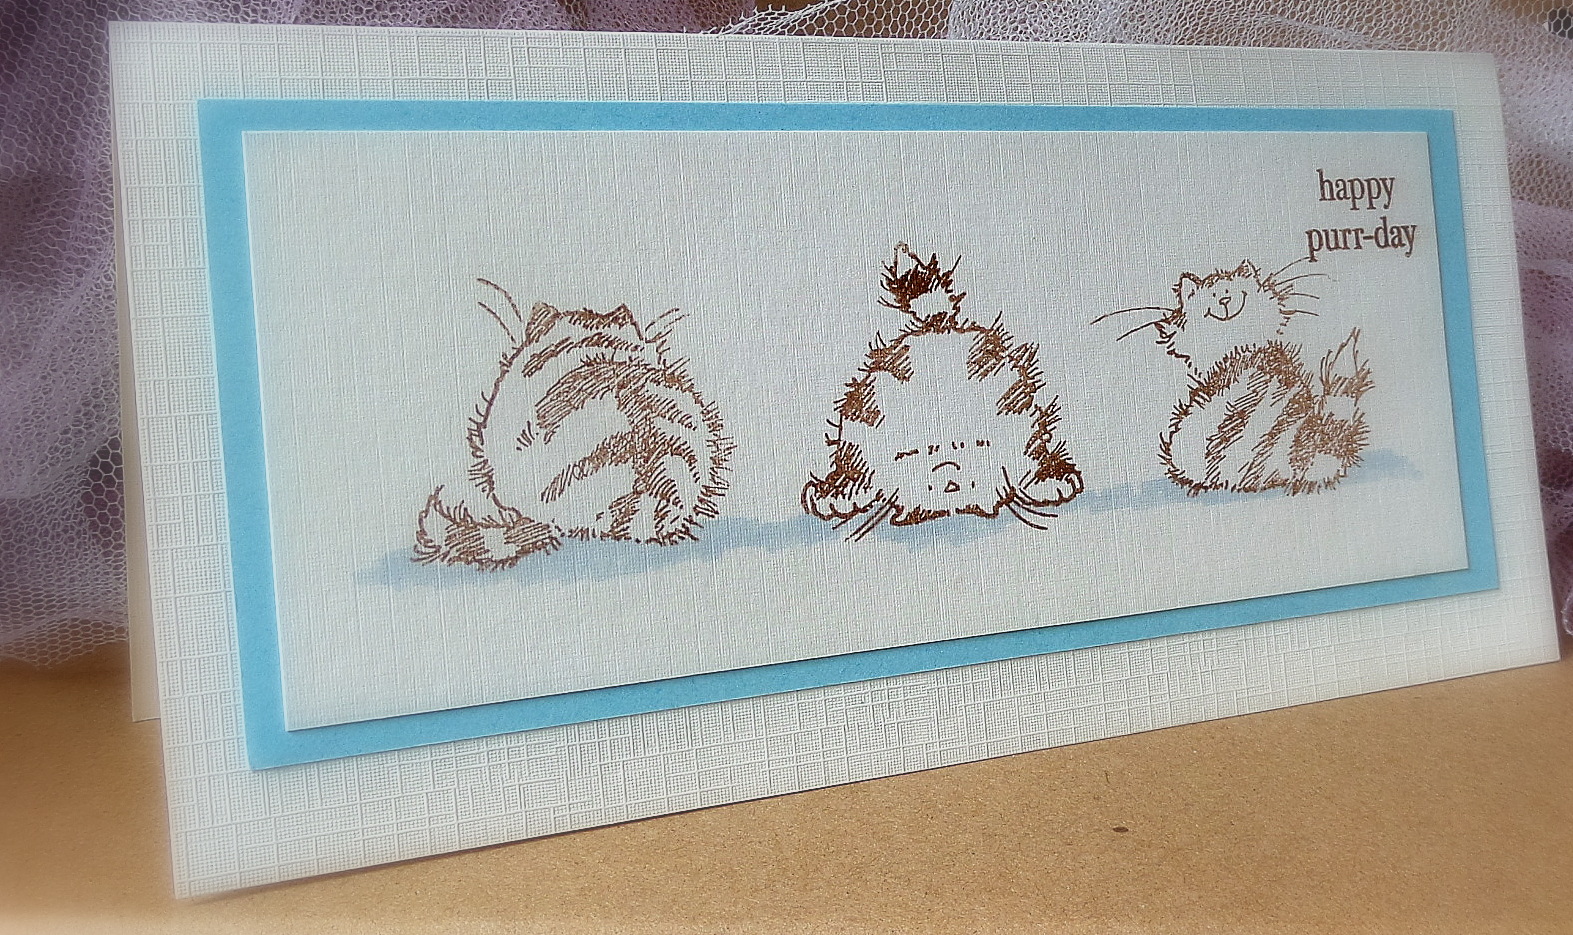
One of the sets I finally decided on was the Penny Black T for Transparent "Nine Lives" (I've also got the "You're Retro" Set on order too) so here are the first three cards I've made using them.


I think these stamps lend themselves rather well to little stories. In this one we have a puss who seems rather pleased with their efforts at performing a handstand!


This one seems to have just come up with a great idea!


As soon as I saw these next stamps I knew exactly the words I wanted to use with them so out came one of my Dyan Reavely sets - it's a Christmas set but just seemed to fit the expressions of these cats to a T!


I used

Cardstock
Linen DL Card Blank - Hobbycraft
Kraft 6 x 6 Card Blank - Hobbycraft
Other card - PayPer Box

Stamps
Nine Lives - Penny Black T for Transparent
Christmas Words - Dyan Reavely

Inks
Vintage Sepia - Versafine
Various - Promarkers

Sunday, 20 September 2015

Be You!

Not blogged for about 2 weeks, unfortunately when my son had our wee Jack Russell out for a walk it was attacked by a the same Husky that attacked him almost 3 years ago and it has left him rather traumatised so I've been having to look after him. My boy rather shaken especially as they were chased all the way into our front garden with the Husky's owner hauling it off Jack on our doorstep! Whilst he wasn't as badly injured this time he's still been in a lot of pain and it was nearly a week before he was able to go for a walk/hobble outwith the back garden.

The Police, actually came out to get a statement this time because it was the same dog who had attacked him before, that and the fact he was being walked by a youngster when it happened. The PC said that a report would be sent to the Fiscal.  The local Dog Warden has  also contacted us and told us that there will now be a Control Order put on the Husky. Shortly after the last attack it was seen with a muzzle on and was kept on the lead but that didn't last long, hopefully this time they'll take heed.  We've certainly noticed that they have changed the route they walk and no longer pass our house!

A couple of days ago my son announced it was one of his friend's Birthday and there were plans that some way or another there would be a party. This particular friend is embracing his inner Emo/Goth look at the moment and has a habit of "borrowing" his sister's eye make-up. We have had discussions on the merits of eye pencil over liquid liner etc so I thought for his Birthday I would treat him to some eye-liner and related bits and bobs of his very own. I also thought I'd make him a card using one of the Tim Holtz Bird Crazy Stamps combined with a Dyan Reaveley sentiment that I think sums up individuality - "Be you, the world will adjust".


Cardstock:
PayPer Box -  Kraft,
Image Super Smooth - White 300gsm
 
Stamps:
Stampers Anonymous - Tim Holtz Bird Crazy,
Ranger - Dyan Reaveley - Laugh Til You Leak,
Crafter's Companion - Moonbeam Meadow
 
Ink:
Memento - Tuxedo Black
Letraset Promarkers

Thursday, 13 August 2015

Time to Try Tim's Tags!

Whilst searching online for Tim Holtz products I kept coming across references to his 12 Tags projects so finally decided to investigate further.  I found the Tim Holtz 12 Tags of 2015 and his tutorial for the August one and decided it was perhaps time to give it a try. So I can now answer one of his "Way with Words" stamps "When was the last time you did something for the very first time?" with "Today!".

 
I've decided that if you like to get messy whilst crafting then this sort of thing is made for you and, oh boy, did I get into a mess! Fun whilst I was making things but a pain to tidy up afterwards - I managed to get glue everywhere but fortunately was able to sort it out before hubby got back!
 
I don't have a lot of Tim Holtz products although I do have some Distress Ink pads, Bird Crazy Stamps & Dies and his "Way With Words" sentiments set so used those as a base to start with. As I don't have any tags I made one from some of my usual cardstock.

For his tag Tim used a series of word dies to cut into the top layer of his tag which was then backed by a printed page and another tag to hold it in place, as I didn't have any suitable word dies I decided to use some heart, star, arrows & flourish shapes instead - unfortunately the camera doesn't seem to be picking up the areas where these are.
 
Once the basic tag was made I took some pieces of a fine tulle netting and a piece of courser net from a bag of lemons and glued them into place before applying white gesso. Once the gesso had dried I used "Peacock Feathers", "Picked Raspberry" & "Mustard Seed" Distress Inks to add colour.  The sentiment "Life doesn't have to be perfect to be wonderful" was stamped and embossed before being coloured with "Peeled Paint". The die cuts were coloured using the same inks as the background, the flourishes were over stamped in Tuxedo Black using a small ivy stamp.


The Bird was coloured with Promarkers and once all the die cuts were in place they were coated with pva glue.

When I ordered the Bird Stamps from Art From The Heart they arrived in a lovely little parcel of red tissue paper tied up with some twine which had a double heart charm attached to it so it I decided it was appropriate to use these on the Tag.

To finish it off I added some bling gems coloured with Promarkers to the die cut stars and some smaller gems added to the crown and arrow tips.


Cardstock:
PayPerBox - Ivory
 
Inks:
Tim Holtz Distress Inks
Letraset Promarkers
Memento - Tuxedo Black
 
Stamps & Dies:
Stamper's Anonymous - Tim Holtz Bird Crazy
Sizzix - Tim Holtz Bird Crazy
Sizzix - Hello Jillybean Soup


Sunday, 9 August 2015

Cute Monkey - Hello There!

While we're still waiting for summer to get here I decided to take my son & my friend over to Glasgow for a day out.

As always on our trips to Glasgow our first stop is the Chinese bakery for a supply of pork buns (yum!). This was followed by lunch at one of our favourite restaurants in Saracen Street before heading off to the shops. School clothes shopping with a 16 year old male of the species is such a joy - not! I swear that it was easier taking him shopping when he was a toddler that it is now he's a teenager! I haven't decided if it's a male thing or a teenager thing but either way it's hard work!
 
For this week's Freshly Made Sketches Challenge I decided to use the small "Cute Monkey" Hot of the Press stamp set I bought in a sale a while ago but had yet to use it to make something - I thought this sketch seemed ideal.
 
The stamp set consists of the main "Cute Monkey", the "Hello there!" sentiment, a single leaf and a banana. I coloured a small piece of card using pastel yellow Promarker and used the wee banana stamp to make a background for the rear panel. The single leaf was stamped onto a small strip of cardstock for the banner behind the main embellishment. 


Cardstock
PayPer Box - Ivory
Stamp
Hot off the Press - Cute Monkey Set
Inks
Tsukineko - Brilliance Tiramisu
Letraset Promarkers


Tuesday, 28 July 2015

The Birds - Part One

I've had a set of the Tim Holtz designed Bird Crazy for a wee while now and often stamp  them out and colour them in with my Promarkers just because I can - they do say colouring in is good for unwinding!

Last night I decided that I really needed to do something more with them so had a look through my Dyan Reaveley words stamp sets (I think they work really well with these expressive looking birds) and came up with a few ideas.

I love these weird & wonderful birds, and am already working on some more ideas for using them!


Wednesday, 22 July 2015

New Dies

I've been eyeing up some of Sue Wilson's Creative Expressions dies for a wee while now and earlier this week finally decided on two to treat myself to a couple.  After a lot of consideration I chose the "Tethered Hearts" Die Set from her Striplet Collection and an Ursa Die Set from her Gemini Collection.
 
I used both sets to create inset designs, they are so lovely I decided to keep the cards really simple and embellishments to a bare minimum.

The first has the "Tethered Hearts" set into the centre of the card and backed with a lovely light blue embossed foiled cardstock. The same blue card was used to create the sentiment and was finished by the addition of two small love birds and a bit of bling coloured to match the cardstock.


The Ursa Die was used twice (well it is from the Gemini Collection) to create a larger design which was then backed with a lilac pearlised cardstock and finished off with a small "Love" charm and some ribbon and bling which were coloured to match.


Cardstock:
All from Payper Box
 
Dies:
Creative Expressions - Striplet Collection "Tethered Hearts"
Creative Expressions - Gemini Collection "Ursa"
Spellbinders - "Congratulations" 
 
Embellishments:
Club Green - White & Silver Ribbon
Love Charm & Bling from own craft stash
Letraset Promarkers
 

Thursday, 16 July 2015

Love Flies

The Open Golf starts in St Andrews tomorrow and over the last few days or so the traffic has been building up as people head along the coast for the practice rounds. No doubt I shall be awoken in the morning by the sounds of helicopters flying overhead ferrying those who can afford such things to and from the golf. I had originally planned not to travel along that way between now and Monday but I was reminded tonight that I have to go and deliver some craft stuff to my friend for a project she's working on and needs as soon as possible.
 
This week's Freshly Made Sketches Challenge is probably the one that I have found easiest to decide on what to do.
 
Over the last wee while I have begun accumulating more & more stamps and one of the ones that arrived earlier this week was a small Hot Air Balloon by Dovecraft. Yesterday I had stamped out a few to practice on and as soon as I saw this sketch I decided that they would be the shape I would use. I decided to go with the ones that I had coloured using various neutral & brown tone Promarkers to try and give a vintage feel to them.


I created a background on some ivory coloured cardstock by swirling some Tim Holtz Faded Denim Distress Ink to give it the appearance of  a slightly cloudy sky. 
 

 Cardstock:
PayPer Box - Kraft
PayPer Box - Ivory
Image SuperSmooth - White
 
Stamps:
Dovecraft - Balloon
Debbie Moore - Love
Debbie Moore - (Time) Flies
 
Inks:
Versacolour - Sepia
Tim Holtz Distress Ink - Faded Denim
Letraset Promarkers


.


. 


Sunday, 12 July 2015

The Letter

I have had my eye on "Frou Frou" Art Deco-esque stamps from Crafter's Companion for a while and been having "do I, don't I" moments where they made it to the basket only to be taken out again. Last week I finally gave in and got some - the special offer and Club discount helped!

The main stamp I've used for this weeks Freshly Made Sketches Challenge is the Frou Frou 


"Love Letters" which I coloured using Promarkers. I thought that because of the sentiment I had in mind for her, "I'm leaving now to go and find myself. If I return before I get back please ask me to wait.", suggested that she perhaps ought to be blonde (no offence to any other blondes out there intended!). The sentiment is something I saw a while ago, thought it was a bit of fun, so made a note of for use later.


The other stamps, the floral corner and the lips, come from a couple of small packs of Royal Langnickel stamps I picked up at my local "Home Bargains" for the princely sum of 29p per set!


I have also entered the http://papertakeweekly.blogspot.co.uk/ "Anything Goes" challenge and http://cardsgalorechallenges.blogspot.co.uk/ July "Use a stamp" Challenge.

Cardstock:
Image Supersmooth White
Create & Craft Single Sided Pearlised Pastels
 
Stamps:
Crafter's Companion - Frou Frou Love Letters
Royal Langnickel  - Hugs & Kisses
Royal Langnickel - Floral Touches
 
Inks:
Memento - Tuxedo Black
Letraset Promarkers - Various
Club Green DS Satin Ribbon - Black

Friday, 3 July 2015

Hello My Friend - FMS 193


The temperature's rising! Wednesday was the hottest July day since records began and to celebrate that fact it was followed by a rather spectacular thunderstorm in the evening that lasted for several hours!

Out in the garden my "Deep Secret" rose is in bloom. This rose was one of my garden centre rescues a few years ago and I have to admit it's my favourite. Whilst in the photo it looks dark pink it is, in fact, deep red with the most beautiful velvety petals.  It is also rather large with this bloom being the diameter of a large saucer - pity they haven't invented scratch'n'sniff monitors as it's scent is absolutely heavenly. 


.
 
 
I was working on how to put together my card for this week's Freshly Made Sketches Challenge but after I had put it together I had gone out in the garden and on smelling the roses I decided to change the embellishment from a yellow daisy to a red (sort of) rose. The "sort of" is because I don't have a rose die so I just used some Sizzix ones from a stamp set that were sort of, roughly, that kind of shape!


I started off with a scrap of red card and a piece of white ribbon with some yellow daisies on it that gave me one of those "I wondered where that went" moments. As the background card is an ivory colour and the ribbon was white I decided to get my Promarkers out and originally thought to colour it red to match the red card but then thought to I could tie in the other colours I was planning to use by colouring it in bands - I think it has helped to bring out the ribbon's yellow daisies.


Here is the original version I made of the card.


Cardstock:
Assorted PayPer Box
 
Dies & Stamps:
Sizzix "Hello Friend"  from Hello by Jillibean Soup Stamp & Die Set
Sizzix - Flowers No.6 Framelits Die Set 

Spellbinders - Jewel Flowers & Flourishes
 
Inks:
Memento Tuxedo Black
Letraset Promarkers

 
Embellishments:
Card Candy
Ribbon from my stash


Sunday, 28 June 2015

Embossed Ribbon

Someone asking a question on Facebook earlier about inking onto ribbon left me thinking about how to do that without the ink sinking into the weave. The only thing I could think of was to use a PVA solution (like Modge Podge) to seal and stiffen it first.

I've not tried it but it reminded me of this technique I use to emboss ribbon:
Make up a 50/50 solution of PVA/Water or Mod Podge or other liquid glue that dries clear (I used my Amos clear for this one) put the ribbon in the glue solution till wet through, remove excess and allow to dry and stiffen up (thinking about it now, it  may also be possible that a starch solution/spray starch would also work).


 thought I had a photo of a previous effort but couldn't find "one I did earlier" so I decided to make some up using some single sided satin ribbon. 

Once the ribbon was ready I used a Darice border embossing folder (piece of thin card in first with the ribbon  on top of it to give the folder something to "bite" into) and ran it through my Spellbinders Sapphire. I only used the Sapphire because it was sitting out and I couldn't be bothered hauling out my GC for a small piece of ribbon. As Spellbinders don't have a Sapphire equivalent of the "Raspberry" Embossing Plate, the "sandwich" I used for the Sapphire was Cutting Plate C, Embossing (Tan) Mat, Darice folder & topped off with a thin card shim for good measure).

Once I had the piece of embossed ribbon I decided I'd better make something to show it off so here it is on a finished card:


I used PayPer Box Kraft card which I top folded as an A6 base. The embossed ribbon was wrapped across a piece of trimmed ivory coloured textured cardstock which was used as a layer on top of the Kraft card.

I coloured some pearlised cardstock with a "Sandstone" Promarker to match the ribbon, and used it to make some floral die cuts to create an embellishment.  I also colour matched the Card Candy.


Cardstock:
PayPer Box - Kraft
PayPer Box - Ivory Textured
PayPer Box - White Pearlised
Dies:
Spellbinders - Flowers & Flourishes
Spellbinders - Poppy

Accessories:
Ribbon - Club Green Gold Single Sided Satin
Card Candy - White
Embossing Folder - Darice Border Flourishes
Letraset Promarkers