Thursday, 25 June 2015

Spellbinders Sapphire Butterfly Die Update II

A package from Spellbinders finally arrived at my doorstep.

I saw it was a biggish box, "Oooh" I thought, "this could be interesting"! That thought last but a nanosecond when the postie handed it to me and it was as light as a feather!


No wonder it was so light, when I opened the box all it contained was a lot of screwed up kraft paper and a sheet of bubble wrap (have they never heard of "Jiffy" bags?) bundled around a tiny cello bag containing the new die! Yep that was it, no letter of apology, not even a compliments slip and certainly no sign of any goodwill gesture for alerting them to problem in the first place!!! I think they probably spent more on the packaging than they did to make the die, the customs slip gave the die's value as $1 or around 65p!
 

Here are the two butterfly die together to show how it's been modified with a rounder interior to the wings:


As for Create and Craft, the company who sold the Spellbinders Sapphire with the die set, I've heard nothing since I was contacted on 27 May 2015. The person from the Customer Service Escalation Team told me they would keep me informed of the progress of my complaint - mind you, there are a lot of unhappy people posting to their Facebook page at the moment so maybe they're busy sorting them out first!!!

Neither company seem anxious to make the problem known and it would appear that if you have one of the sharp dies it will only be replaced if you contact Karen Haas Spellbinders' Care & Customer Support Manager with a photo of the offending item.  (Karen was also the contact who arranged a replacement handle for my original GC when it snapped off.)  

Sunday, 21 June 2015

Busy with Birthdays!

It's been a busy time Birthday-wise (not forgetting it's also Father's Day) this weekend. The next day or so will also be busy as I have a number of Sympathy cards to finish after a family bereavement as well as floral tributes to create.

As well as it being my friend Gena's Birthday it is also the 40th Birthday for  Niece, Donna, so that's three Birthday cards and two Father's Day Cards. I'm only posting the Birthday cards on my Blog today.


:: :: Good Friends:: ::


For Gena I've made two cards, one for my son, Liam, (Gena's Godson) to give her and one from Hubby & Me.

I've had these Tim Holtz stamps for a few weeks now and have been practicing my "colouring in" in preparation for finally getting around to using them properly.

I had a few false starts stamping the images as I hadn't quite got some of the positioning right. I impressed myself with my first attempt masking off and stamping a second image to look as though one was behind - only to put the word "alone" in the wrong place!  With a bit of jiggery-pockery in the guise of a die cut label
stamped with a sentiment I think I may have got away with it!


As I was using the same Bird Crazy stamp on the inside as well as the outside
I coloured them both at the same time to ensure that they matched as well as I could get them to.


Outside of Card


Inside of Card

Cardstock:
Image - Supersmooth White
American Craft - "Summer" Collection Blues

Stamps:
Stampers Anonymous - Tim Holtz "Bird Crazy" & "Way With Words"
Lawn Fawn - Balloon from "Hippo Birdie" Year Four die set
Lindsay Mason Designs - "Everyday Words Happy Birthday"

Ink:
Memento - Tuxedo Black
Ranger's Tim Holtz Distress Ink - Faded Jeans
Letraset ProMarkers - Assorted Colours


 :: :: "Hippo Birdie To Ewe" :: ::


The one I made for Liam to give was a fun one based on the Karen Burniston's Katie Label Pivot Die from Elizabeth Craft and Lawn Fawn's "Hippo Birdie" stamp/die set. I thought if you have a Hippo and a Birdie you really need to have two Ewes as well so I also used Rachelle Anne Millar's "Love Ewe" stamp set from Crafter's Companion. To complete the card I used Couture Creations "Pure Pleasure" small embossing folder - oh and some Marianne Design Butterflies & Flowers coloured with Promarkers then heat embossed with glitter embossing powder!

Front
Card When Opened


I used a fine liner pen to try and create a similar grassy area under the Hippo & Birdie dies as on the "Love Ewe" Stamp

Close Up of Ewes


Cardstock:

 PayPer Box - Turquoise
Image - Supersmooth White

Dies: 
Elizabeth Craft - Karen Burniston's Katie Label Pivot Die Lawn Fawn - "Hippo Birdie" Year Four die set
Joy! Crafts - Cut & Emboss Butterflies Set, Cut & Emboss Flower Set

Stamps:
Lawn Fawn - "Hippo Birdie" Year Four stamp set
Crafter's Companion - "Love Ewe" stamp set by Rachelle Anne Millar

Ink:
Memento - Tuxedo Black
Letraset - Promarkers Assorted Colours

Embossing Folder:
Couture Creations - "Pure Pleasure"


 :: :: Donna's 40th :: ::

For Donna's Birthday I spent rather a long time working on this card only doing a little at a time and each time not being entirely happy as it wasn't quite coming out as I imagined it would!

Apart from the Karen Burniston's "Lots of Pops" Pop Up die from Elizabeth Craft the embossing folder and dies are from Spellbinders. I used a pearlised card stock but some sheets appeared to be a slightly different colour to others which I didn't really spot when working late at night under artificial light. I also put my new heat gun to use heat embossing butterflies with a glitter powder - in the photo below they appear to be quite dark but there certainly wasn't such an obvious difference in "real life".  


Inside is the Karen Burniston "Lots of Pops" Pop Up mechanism which was teamed up with the labels from the "Lucy Labels" Pop Up set, acetate strips (recycled from some packaging) and various Spellbinders' butterflies which were heat embossed with embossing powder. When Donna got married she used the same colours with a butterfly theme so made this card with that in mind. The interior card was embossed with Couture Creations "Ambrosia" Folder.


Cardstock:
PayPer Box Pearlised
Dies:
Spellbinders "Outrgeous Butterfly", Small Butterflies from "Postively Me" Jewel Flowers and Flourishes Set, D-Lites "Corners & Accents Two" 

Elizabeth Craft's Karen Burniston "Lots of Pops", "Lucy Labels"

Embossing Folders:
Spellbinders "Labels Thirty Four Medallion"
Couture Creations "Ambrosia"


Friday, 12 June 2015

New Toys!

The wind and rain have, at last, subsided and the sun has finally reached the Kingdom of Fife - yipee!!! I always feel better when the sun is shining - my joints certainly appreciate the warmer weather!

When I was have my clearout the other week I came across several jars of embossing powder that I've had for a few years but hardly used as my heat gun stopped working and I never got around to replacing it.  I had some Birthday money left over so decided maybe it was time to get a new one so I bought a Ranger Heat It tool along with some UTEE to try.  The UTEE is Cosmic Shimmer but for some reason this particular colour was rather cheap and classed as an "add on item" on Amazon - I wasn't too bothered about the colour, Lapis Black, I just wanted  get some to try it out.)
My order has now arrived so it was time to play. I found that perhaps why the UTEE was cheap was maybe due to the fact that the Lapis Black ain't black, it's more of a peacock blue/green. Never mind, as long as it works!

I dug out some of the die cuts I'd been making from scrap cardstock on my new Spellbinders Sapphire and set to work on them. I took a Joy! Craft butterfly applied clear embossing ink then sprinkled on the UTEE, once it was melted I sprinkled it with some gold and silver ordinary embossing powder and reheated it before decided to add a little black to it as well. Turned out rather well I thought - think it would make a nice brooch if it had been put on chipboard.

For this week's Freshly Made Sketches Challenge card, (based on sketch below) 


I decided to use a filligree style butterfly within the oval. Once cut & clear inked I  used black embossing powder, heated it to melting point then added some of the UTEE to give it a little splash of colour.

Once I had my butterfly sorted out I set about looking for what else I could use. I took my Darice Oval embossing folder and embossed some pearlised cardstock which was then trimmed around the scalloped edge to create a topper.


I played about with my Promarkers to create a coloured a strip to go down the left hand edge, the nearest colour in my collection which toned with the Lapis Black was "Soft Green".  Originally I thought of making diagonal black and Soft Green stripes but then settled on plain green before deciding that was too plain! To compromise I cut a narrow, tapered, strip from one of the striped pieces I'd made and stick it on a diagonal over the Soft Green one. I finished off by adding a daisy with a coloured (& glittered) centre and a colour co-ordinated "Love" sentiment. I toyed around with making my own version of baker's twine (using kitchen string and Promarkers) but wasn't sure if I liked it so took photos of the card with & without - still not sure which version I prefer!


Cardstock:
PayPer Box - Pearlised White
Image - Supersmooth White

Dies:
Spellbinders - Outrageous Butterfly
Spellbinders - Jewel Flowers & Flourishes.
Lawn Fawn - Scripty Love
 
 Inks etc:
Dovecraft - Clear Embossing Pad
Cosmic Shimmer - UTEE Lapis Black
C&C Embossing Powder - Black
Superfine Clear Glitter

Letraset Promarkers - Black & Soft Green

Saturday, 6 June 2015

Summer's Here (sort of)!

It's June, it's supposed to be Summer so why am I feeling so cold & need the heating on! So far all we've had is rain and at the moment the wind is, as they say in these parts, "blawin' a hoolie" with gale force winds forecast!

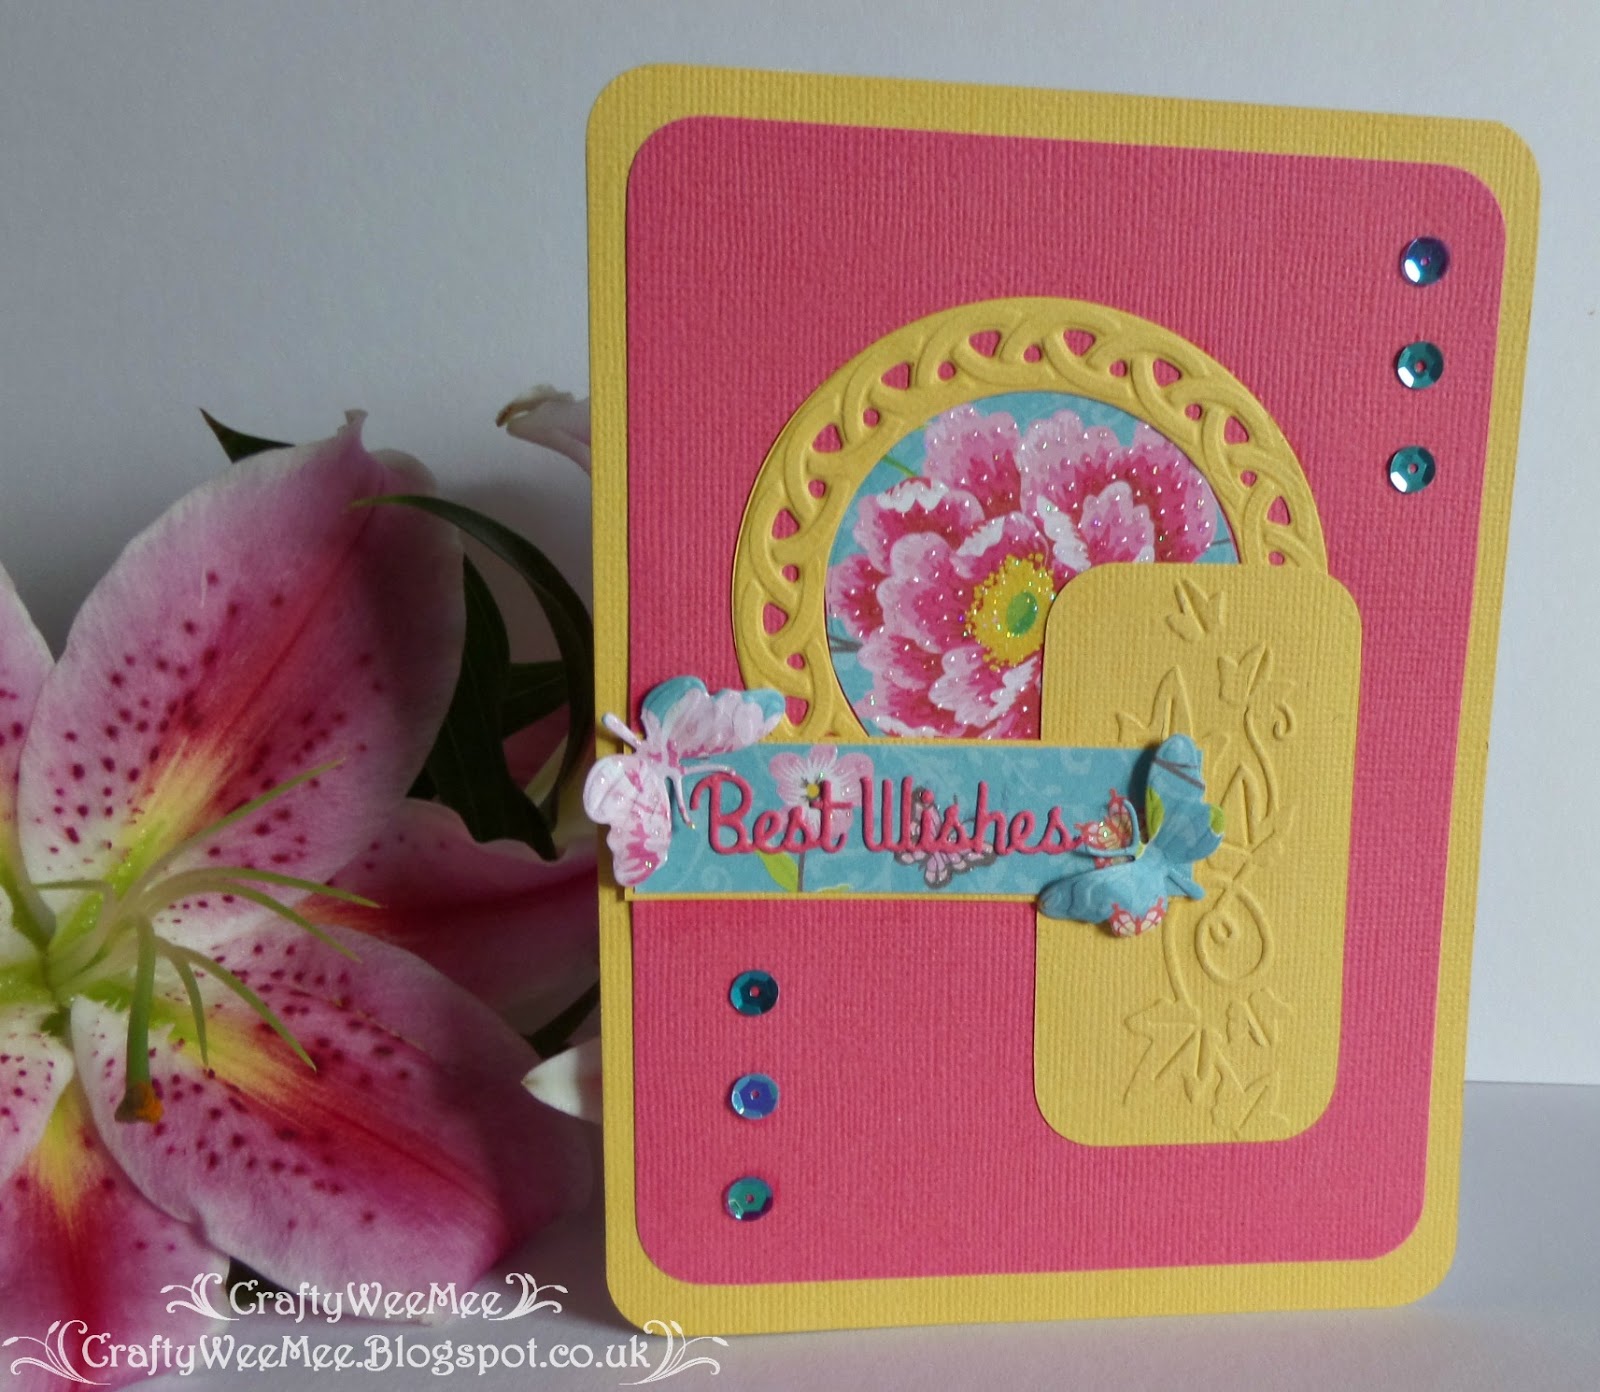
For this week's Freshly Made Sketches challenge (No 189) I decided to go with some bold coloured cardstock for a change.


When shopping in Lidl yesterday there was a pack of craft papers with some lovely bright, bold, designs in it which just sort of leapt off shelf, threw itself into my trolley and begged me to take it home with me (well that's my excuse anyway!). Fortunately I also just happened to have a box of American Craft "Summer" 12x12" cardstock which has some similar colours to those in the new paper pack - had it for ages but this was it's first outing. I have to admit I don't normally use mainly coloured cardstock as a background so this is new territory for me! The AC cardstock was matted and layered onto white pearlised card.


Once I had put this photo up on the blog I realised that I had made some mistakes in putting it together - one being there are too many different floral patterns in it.  I also felt that the circular section was too big - nothing for it but to have another go!

I really must get some more circular dies as the only ones I have are from the Joy Craft Floral and Celtic Circles set or really dinky ones that came with the Spellbinders Sapphire - must add some to my wish list!  


I just kept to the same basic colours - a case of waste not, want not - as I'd already cut into the cardstock and there was plenty left over. I reduced the size of the circular section etc and changed the embossing folder used. I used the floral paper to create a couple of butterflies and had a rake though my box of bits where I found some aqua coloured sequins to finish it off.

I had some gorgeous Oriental Lillies left over from my Birthday so thought I'd use them as a pretty background when I was taking the photos of the cards - they smell rather wonderful too!


Cardstock:
American Crafts - "Summer" Seasonal 12x12"
Crelando - "Romantic" Patterned Paper
PayPer - Box White Pearlised 

 
Dies & Embossing Folders:
Joy Craft - Floral and Celtic Circle Die Set
Joy Craft - 3 Butterflies Embellishments
Spellbinders - D-Lites Sentiments 1

Darice - Poppy Field
Darice - Ivy Corner

Embellishments:
Sequins (from my stash)


Sunday, 31 May 2015

Moroccan Squares - FMS 188

 I recently spotted a Tim Holtz stamp which says "One of the advantages of being disorderly is that one is constantly making exciting new discoveries" and thought that just about sums up my craft cupboard! I'd been having a bit of a clear out and came across a couple of punches I've had for years which have a Moroccan design (I think they might be X-Cut) so thought I'd try using them for this week's Freshly Made Sketches Challenge No 188. 


Before rediscovering the punches I had been considering making a window card - I'd been playing with a couple of ideas for this but decided to try something a wee bit different instead.

I'm really not sure if it's allowed to change the style of card away from a standard single fold in the challenge but I wanted to experiment with an idea I had for an interlocking gate fold card.


Using a couple of Spellbinders Label 4 dies nested inside each other I created a central panel with a frame, cut from matt bronze metallic cardstock, which that also doubles up as a closure for the gate fold.


I've used a pearlised card as the background and embossed the side panels with a Couture Creations "Wild Holly" embossing folder. I punched out some of the Moroccan designs and cut them into shape using the small square dies from my new Spellbinders Sapphire. These were then mounted as diamond shapes onto pieces of the pearlised card which had been coloured with a Leaf Green Promarker to add a "pop" of colour. The central punched square was mounted with DS foam tape onto the green card which was also foam mounted to raise it above the outer two.
 

The design is finished off with an X-Cut Fleur-de-Lis die and pearls coloured with Promarkers.


The corners of the gatefold edges were rounded with a deco styled corner punch while the top and bottom of the back panel inside the card were trimmed with green strips to match the exterior colour.


To create the closure the right hand side of the frame is glued to the right hand flap of the gatefold whilst the left hand side of the centre panel is glued to the left hand flap.


Cardstock:
PayPer Box - Matt Bronze, Pearlised White

Dies, Punches :
Spellbinders Labels 4, Sapphire Basic Set A Squares,
X-Cut Fleur-de-Lis,
Moroccan Punch,

Embossing Folder:
Couture Creations Wild Holly,

Inks:
Letraset Promarkers - Leaf Green, Purple

The wooden box in the photos is one I picked up in Gibraltar many, many moons ago & I believe it shows some Moorish influence.


Monday, 25 May 2015

Hugs & Kisses - FMS 187

Last weekend I had been looking for a new corner rounder punch as mine had decided it didn't want to play any more. I found an X-Cut one online which did both converse and inverse versions so I decided to order it.  The new punch arrived the same day as the new Freshly Made Sketches Challenge was published so imagine my surprise to see that it featured inverse corners!

 
Instead of using the inverse corners on the embellishment I made them a feature on the base of the card design and some Spellbinders Labels 4 for the "Hugs and Kisses" topper.
 
After the problems I had earlier with the new Spellbinders Sapphire butterfly die I wasn't really in the mood to put a butterfly on my card! Instead I decided use the Crafter's Companion "Moonbeam Meadow" stamp of two cute wee mice kissing - aw!

I had some of the nice PayPer Box turquoise cardstock left so used that as a starting point for my colour scheme and used my trusty Promarkers to co-ordinate.


Cardstock
Image Supersmooth - White
PayPer Box - Turquoise
Card Candy - White (coloured with Cool Aqua Promarker)


Embossing Folder:
Darice Dots
 
Dies/Stamps
Crafter's Companion Moonbeam Meadow
Sizzix - Small Hearts

Ink:

Memento Brilliance Trio "Tiramisu" - Black
Letraset Promarkers - Various

Ribbon:

Club Green - White with Silver


Sunday, 24 May 2015

Spellbinders Sapphire Update

After posting on Tuesday night about the new Spellbinders Sapphire I had put away all the bits and pieces and sorted through my existing dies to see which ones would also work with it. Once I had done that I got together some scraps of cardstock and decided to get making some die cuts with some of the new Sapphire dies. I put my hand into the packaging to lift a couple of them out when I felt a sharp pain in one of my fingers, when I took my hand out the packet I found the small butterfly die was stuck into my finger and had to be carefully removed - drawing blood in the process!

 
On closer inspection of the butterfly die I found more sharp points, two being extremely sharp. Thoughts of making cards soon disappeared and I took photographs of the die showing where the sharp points were and sent emails to both Create and Craft, where I bought it, and to Spellbinders who manufactured it.


So far I am unimpressed by the responses from both companies.  I posted a warning on the Facebook group I belong to and others have now said that they too had been hurt or cut whilst handling the butterfly die. Spellbinders have since admitted that there is a fault with the die template in it being too sharp but neither they or Create and Craft have issued a warning to customers. On their Facebook page C&C have ignored any posts mentioning the problems with the die while other posts praising the Sapphire have been replied to! It took C&C almost 5 days to even acknowledge my email and only then after I emailed a senior exec!

The Senior Exec has said he is away until Tuesday but will contact me on his return.


See also: http://craftyweemee.blogspot.co.uk/2015/06/spellbinders-sapphire-butterfly-die.html

Tuesday, 19 May 2015

It's Here!!!

My Birthday isn't for another week yet but hubby's pressie arrived today & I've been allowed to open it!
  
I've just unpacked it and taken a few photos to show how dinky it is in comparison to the Grand Calibur: 


 The Sapphire has two little drop down doors that act as platforms for the plates. From this view I think it looks as though it has a face that's crying out to be personalised. I wonder where I put that pack of googly eyes!
 
It's a pity that Spellbinders decided to change the colour of the plates for the sapphire.  

Whilst I get the reason for changing the colour of the embossing plate from pink to sapphire blue why on earth did they feel the need to change the Base & Cutting plate colours to the reverse of those of the GC - some folks (me) might get confused going from one to the other.
 
If you have a big enough handbag (it fits in my Kipling Defea very easily and with plenty room to spare) you could easily take this on the bus, train or plane and do some crafting on the move. It certainly would be handy to take on holiday in case of rainy days.
 

Handle has a "Sapphire" set into it!
I am now going to go and play with that "might come in handy" box of scrappy bits & bobs that that I have and and get to turning them into some die cuts with the set of appropriately sized dies that came with it. I have some small Lawn Fawn dies that will be just the right size for this and I shall sort through what dies I have and work out what will fit and mark them accordingly for future use.  I'm also going to try putting my Darice border embossing folders through it - I think I have a couple of small Sizzix ones as well that may also fit. Hopefully I shall have a card or two made using this ready to photograph soon!


Monday, 18 May 2015

Scrap Paper Makes

Like most crafters I seem to have amassed loads of bits and bobs including rather a lot assorted scrap pieces of paper that have ended up in my "might come in handy at some point" box. Last night I was going through the box to see what was there as winging it's way to me in the next few days is one of the new Spellbinder Sapphire Die Cut & Embossing machines. These machines are teeny tiny and to me seem an ideal way of turning the scraps into small die cuts.  In the meantime, I decided to turn some of the larger pieces into something useful and came up with these covers for sticky note pads (generic Post-It notes).

These covers are easy to make and are a great way to turn something boring into something pretty. 

If you are looking to entertain the kids on a rainy afternoon these sticky note pads can be picked up in various "Pound" stores (I've found packs of 3 or 4 for £1). They could be made as gifts or perhaps for fundraising at school or group. You can keep them simple, personalise them or really jazz them up with lots of bling!  I made some of these at Christmas time and teamed them up with matching calendars using calendar tabs to give as "mindings".


Paper from Trimcraft Spring in Bloom 6x6" Pad,

Flower Trimcraft Santoro Mirabelle Paper Blossoms

Bling coloured with Promarkers


Paper from Trimcraft Kiss and Tell 6x6" Pad,
Flowers - Trimcraft Santoro Mirabelle Paper Blossoms,
Patterned Craft Tape - Papermania Capsule Collection Spots and Stripes Jewels
Bling coloured with Promarkers
 
 
For the men - something a bit more macho:


Cardstock White Pearlescent & Matt Copper Metallic from PayPer Box. The Copper cardstock were trimmed pieces left over from embossing with Darice folders Steam Punk Gears & Diamond Plate Pattern
 
White "Card Candy" pieces were coloured with Memento Brilliance Tiramisu Ink Pad and made to resemble screws by denting them with end of a nail file!

Sunday, 17 May 2015

A Little Bird Told Me

It's Sunday, the sun is shining (in between the showers) and our garden is starting to bloom! I've had my fingers crossed since January after I took loppers to my dwarf James Grieve apple tree for the first time since I got it as a Birthday present around12 years ago. I'm pleased to say that it is now covered in gorgeous pink blossom so it's looking good for a nice crop this year! 
 
I picked up a "Quick Cards" magazine earlier in the week, I don't often buy magazines but it had a rather nice "Moonbeam Meadow" Stamp Set by Crafter's Companion as a "free gift".  The new set of Promarker Pens I bought as an almost, not quite, nearly, early, Birthday present to myself arrived yesterday so it was practice time!
 
Last night I stamped out some of the "Moonbeam Meadow" designs and set about colouring them, when I was finished I played about with some ideas to use for the  Freshly Made Sketches Challenge #186 
 
As this challenge is based on a sketch  containing a diagonal I was drawn to the design of on a sheet from one of my Trimcraft 6x6 paper pads, Spring in Bloom, which has the main pattern concentrated into the right hand corner. The paper was put into the trimmer at cut on the diagonal and then separated to elongate it to fit a rectangular card shape and to create an inner strip for embellishment.


 The edges of the diagonal were decorated with promarker coloured strips cut using the dot/dash edge die from Spellbinders Borderabilities "A2 Bracket Borders One" set with matching DS satin ribbon (photo shows it darker). The central strip was coloured with Promarker to match one of the pink colours on the background paper. The little flowers and pearls were also colour matched to those on the background paper. The circles  used for the Little Bird topper came from my "might come in handy at some point" box and are the inners left over from cutting out some Joy Craft Floral and Celtic Circles!
 

Cardstock:
Image - Super Smooth White
Trimcraft - Spring in Bloom
PayPer Box - Gold Pearlised
 
Dies:
Spellbinders - Borderabilities A2 Bracket Borders One
Joy Craft - Circle

Stamps:
Crafter's Companion - Moonbeam Meadow

Ink:
Versacolour - Sepia
Letraset Promarkers - Crimson, Dusky Rose, Rose Pink, Pastel Blue, Blue Pearl, Leaf Green, Grass